Mail
Mail How to set up two-factor authentication
Your password is the first lock on your account. Two-factor authentication is the second one, and it is one of the more effective things you can do to keep your inbox safe. With it turned on, signing in takes both your password and a rotating 6-digit code from an authenticator app on your phone, so a password that gets leaked or guessed somewhere else is no longer enough on its own to get in.
Aster’s two-factor authentication is built on TOTP, time-based one-time passwords, the same open standard used by banks and most major tech companies rather than anything proprietary to us. This guide walks through turning it on, what the QR code and secret key are actually doing, and how to hold on to your backup codes once you’re set up.
Where to find it
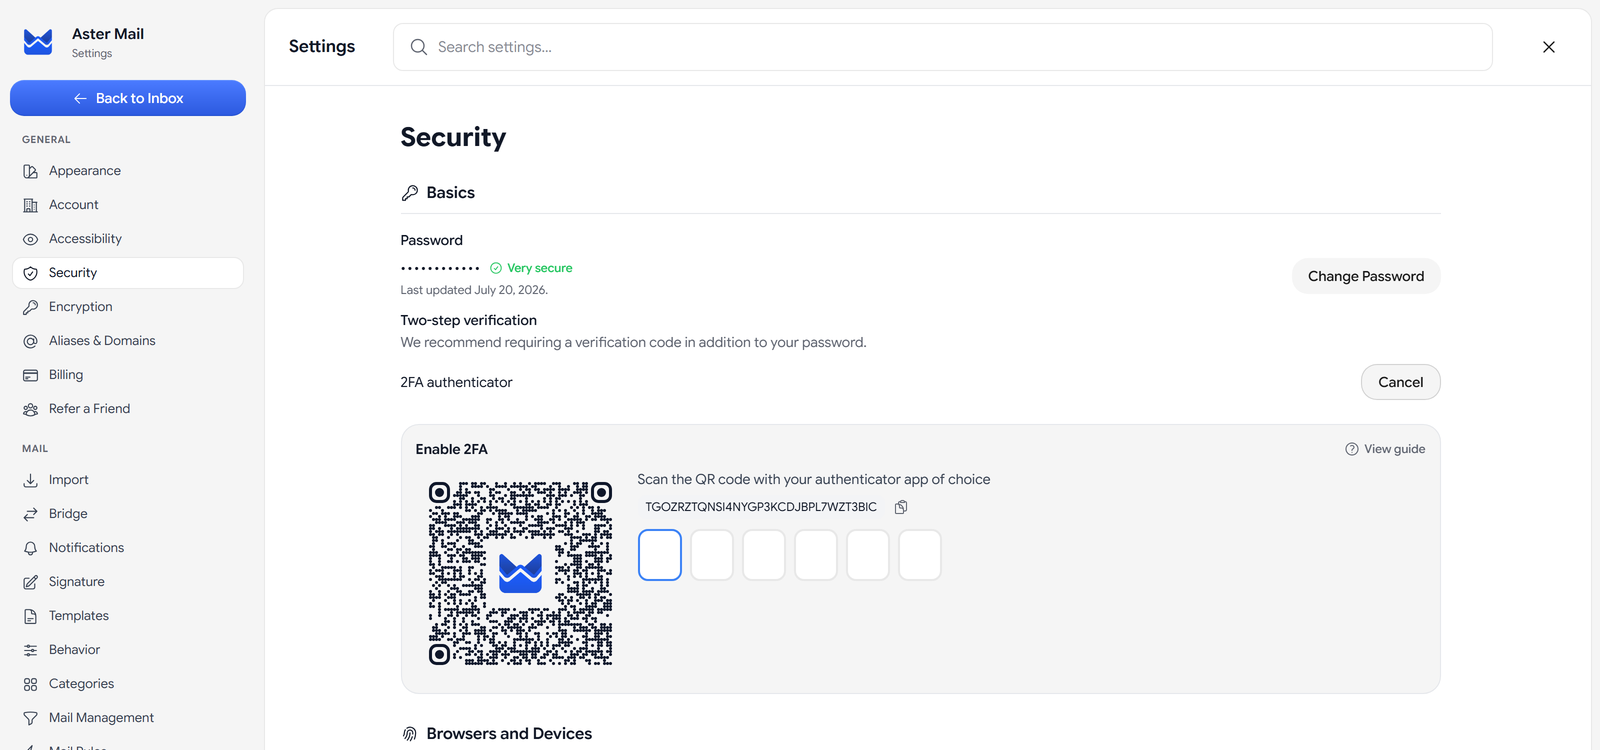
Open Settings, then Security, and look for Two-step verification. Under 2FA authenticator, click Set up to begin.
Step 1: Have an authenticator app ready
Before anything else, make sure you have an authenticator app installed on your phone. Aster works with any standard TOTP authenticator, so whichever one you already trust or already have from another account is fine. There is no lock-in to a single provider here.
Step 2: Scan the QR code
Once setup starts, Aster generates a fresh QR code tied to your account. Open your authenticator app, choose the option to add a new account, usually a + or a Scan QR Code button, and point your camera at the code on screen. The app reads it instantly and adds an “Aster” entry that starts producing 6-digit codes right away.
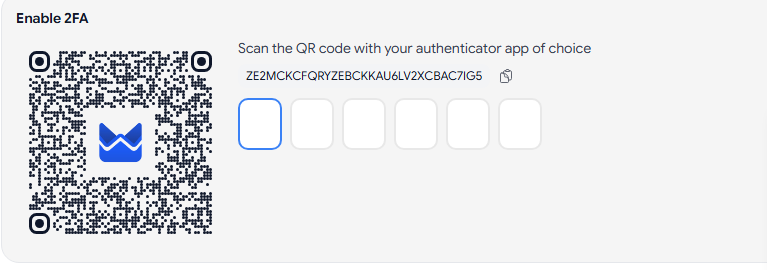
Every 30 seconds, your authenticator app produces a new code, and Aster’s server is running the same calculation in step with it. Neither side ever sends the code over the network to “register” it. The QR code plants a shared secret once, and from that point on both sides can work out the same rotating number independently.
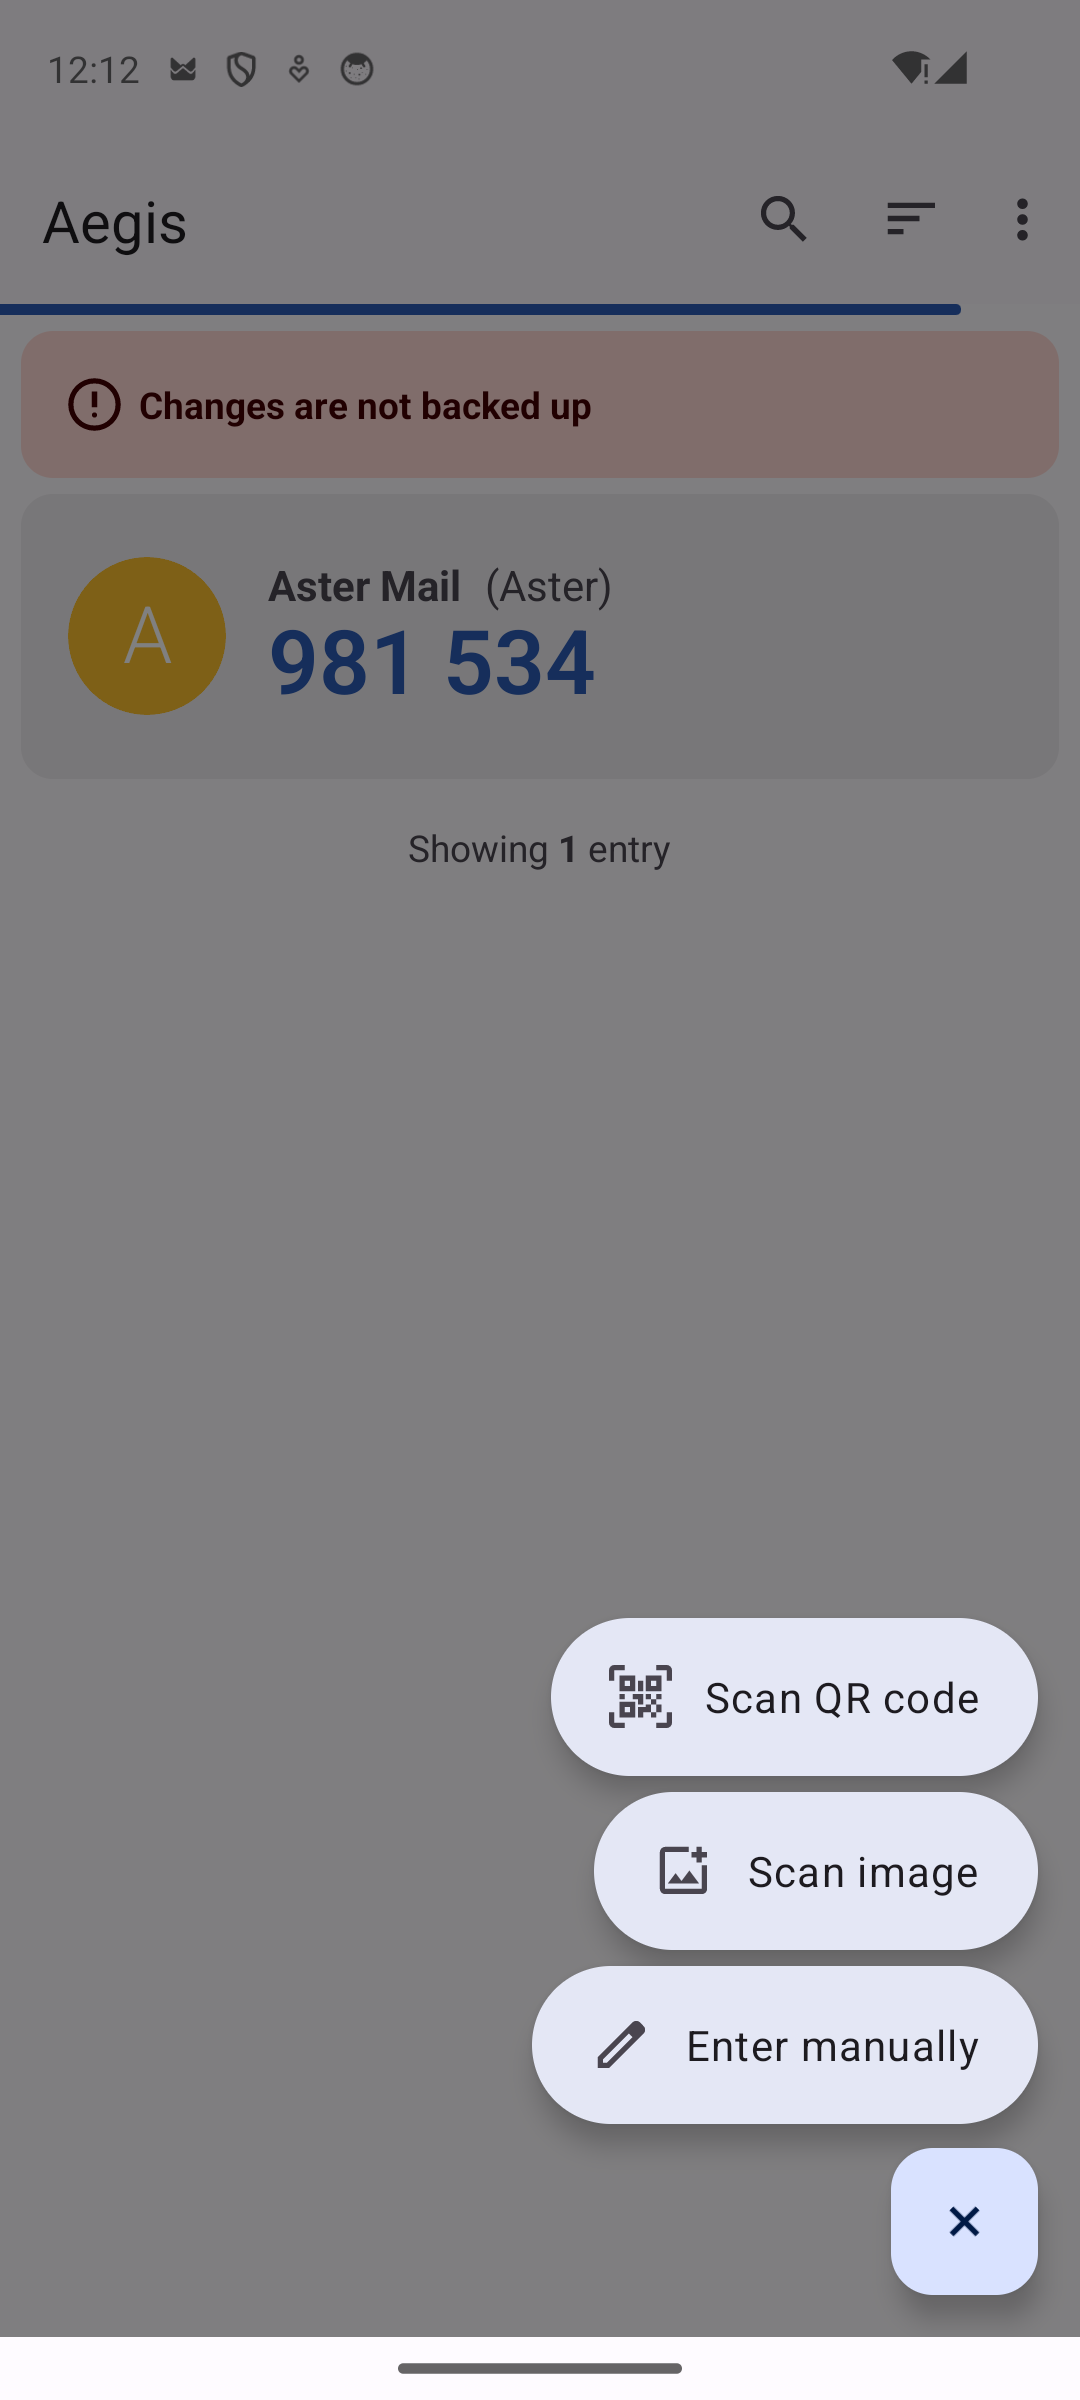
Most authenticator apps give you three ways to add an account: scan a QR code, scan a saved image of one, or enter the setup key by hand.
Can’t scan it? Enter the code by hand
No camera handy, or setting up on a device that doesn’t have one? Next to the QR code, Aster also shows a secret key, a short string of letters and numbers. Tap it to copy it, then in your authenticator app choose Enter a setup key manually (or something worded similarly) and paste it in. This gets you to the exact same place as scanning, it is just the text version of the same secret.
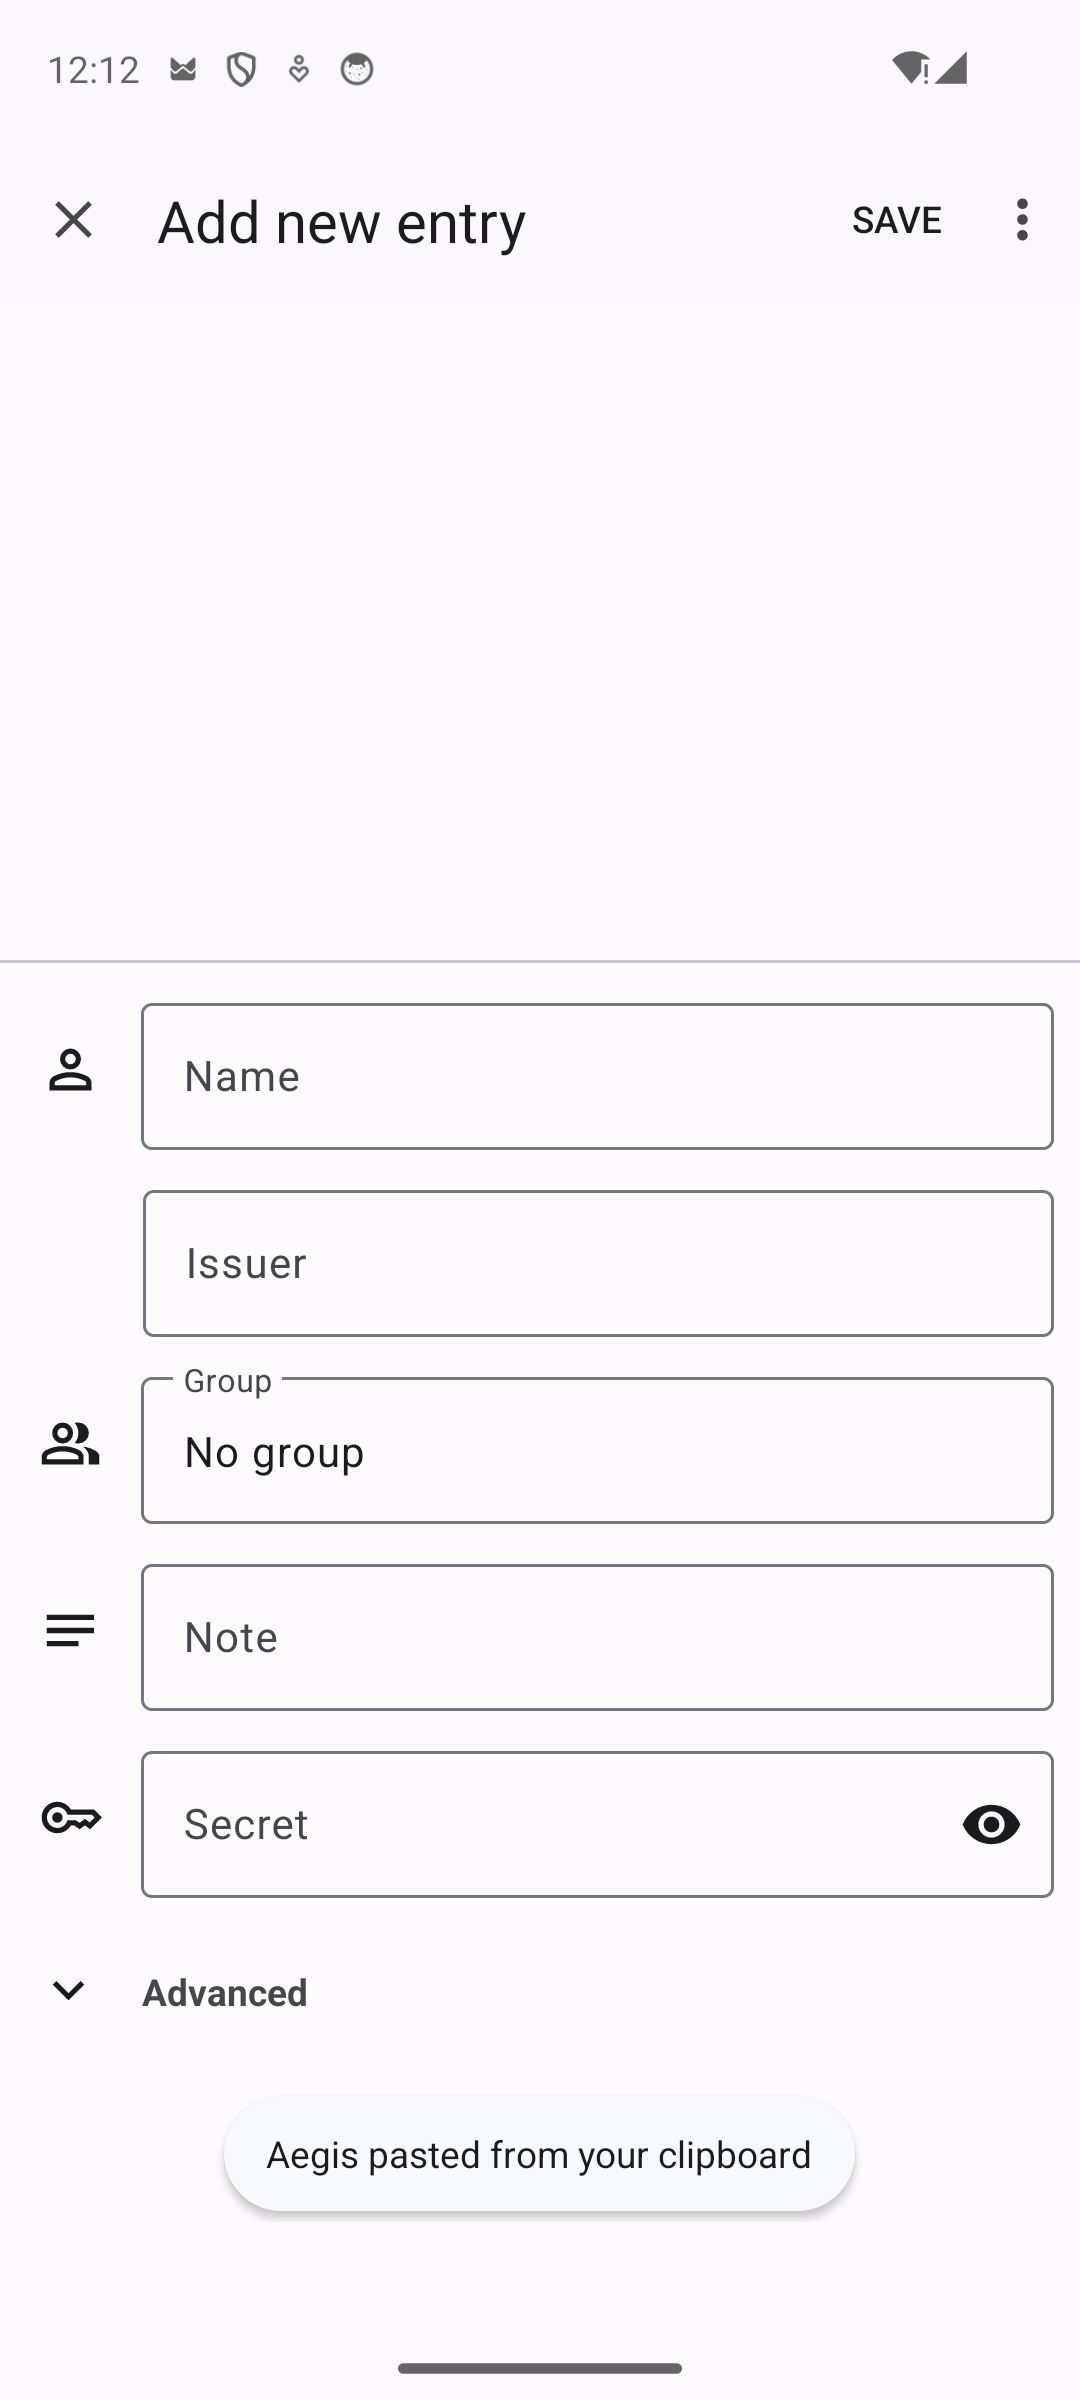
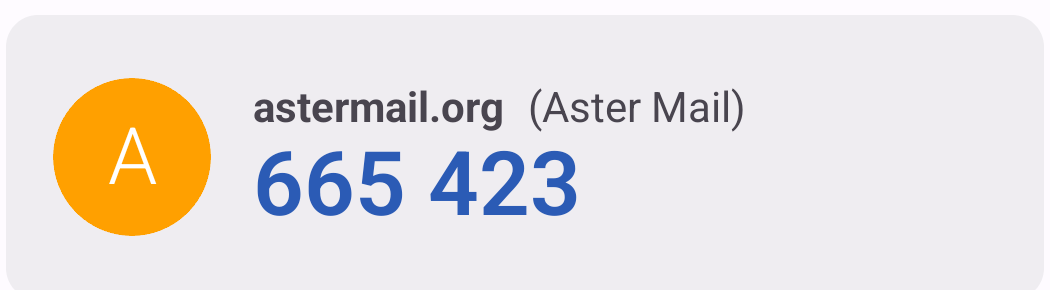
Fill in a name you’ll recognize later, paste the secret into the Secret field, and save. The app starts generating a matching 6-digit code immediately.
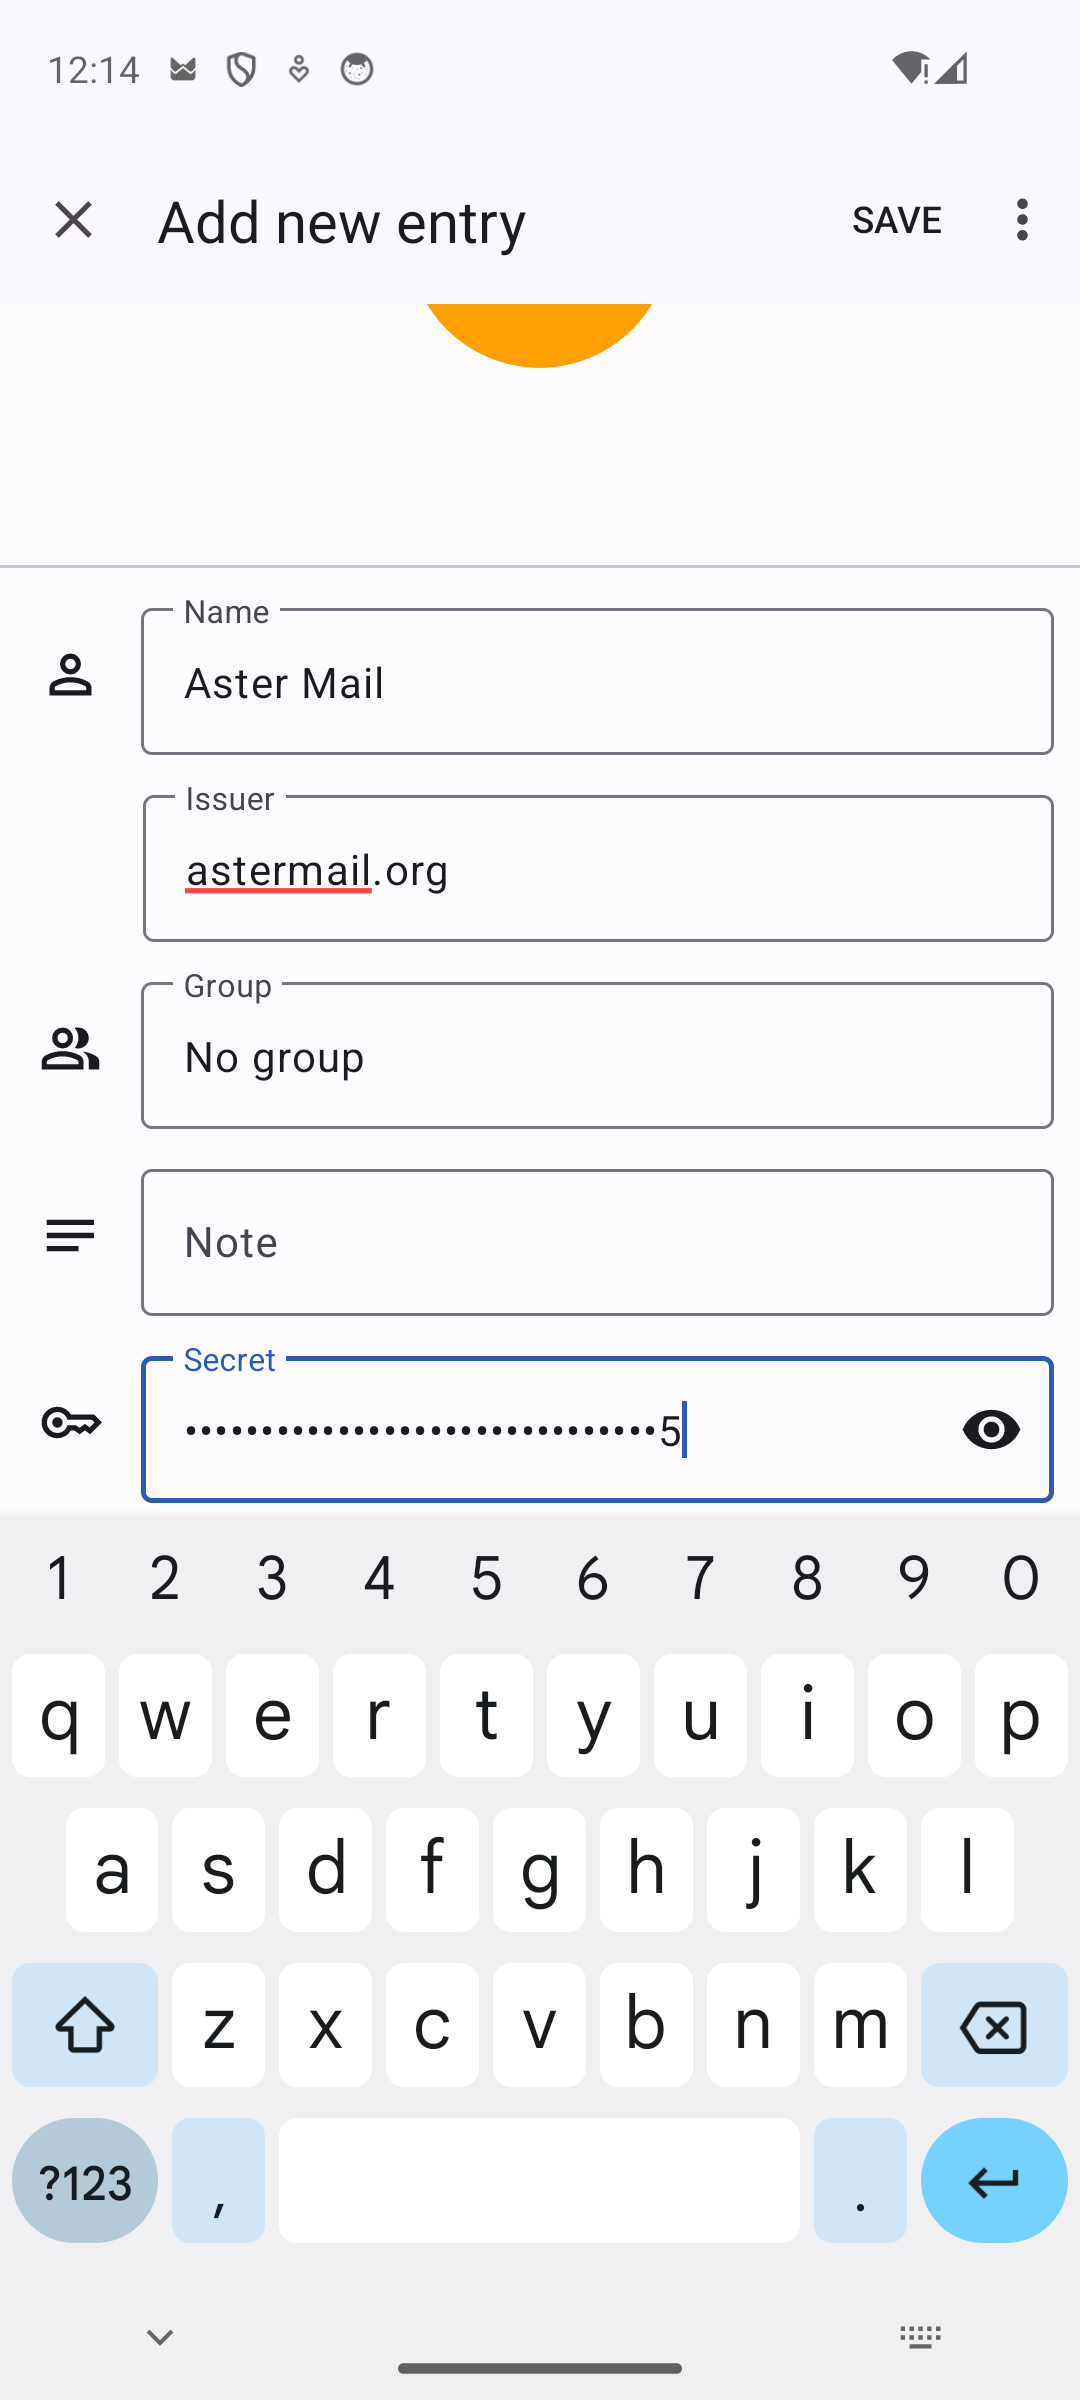
Worth pausing on this one: treat that secret key the same way you’d treat a password. Anyone who has it can generate valid codes for your account from anywhere, so paste it directly into your authenticator app and don’t leave it sitting in a notes app or email it to yourself for later.
Step 3: Confirm with the 6-digit code
Your authenticator app is now showing a 6-digit code that changes every 30 seconds. Type the current one into the verification field back in Aster. This confirms two things at once, that the QR code was read correctly, and that your phone’s clock is close enough in sync for the codes to actually line up. If a code gets rejected, just wait for the next one and try again, it usually just means it was entered right as the old one rolled over.
Once it’s verified, two-factor authentication is live on your account immediately.
Save your backup codes
As soon as it’s confirmed, Aster shows you a set of one-time backup codes. Each one can be used instead of an authenticator code, exactly once, if you ever lose access to your phone. Think of these as your safety net, because without them, losing your device could genuinely mean losing access to your account.
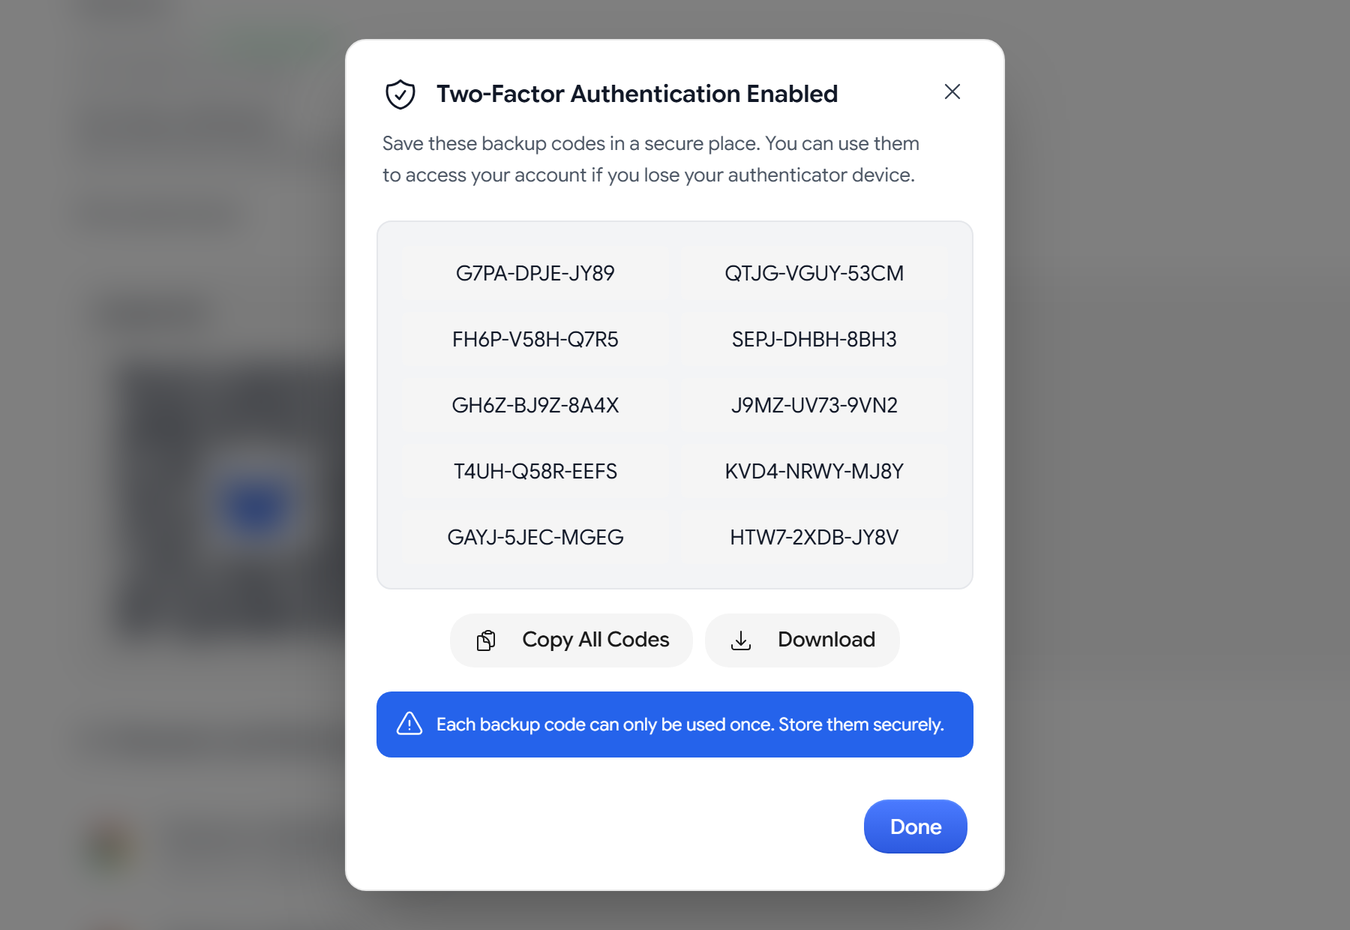
- Copy or download them now. A password manager works well, or print them out. Just don’t leave them as a plain, unencrypted note on the same phone your authenticator app lives on.
- Each code works once. Once a backup code is used to sign in, it’s consumed and can’t be reused after that.
- You can regenerate them any time. If you’re running low, or think a code may have leaked somewhere, generate a fresh set from Settings, Security, and the old ones stop working.
What changes after setup
From here on, signing in to Aster asks for your password first, then your current authenticator code. Nothing else about your account changes, your mail, your aliases, and your encryption keys all keep working exactly as they did before. Two-factor authentication only adds a checkpoint at sign-in, nowhere else.
If you ever need to turn it off, that same Security settings page lets you disable two-step verification. We’d only really suggest doing that if you’ve permanently lost your authenticator and have no backup codes left either, in which case account recovery is the safer path anyway.
A few things that help
- Losing your phone isn’t the end of the world, as long as you saved your backup codes somewhere. Use one to sign back in, then set up 2FA again on the new device.
- Authenticator apps sync their clocks automatically, so if codes keep getting rejected, check that your phone’s date and time are set to update automatically rather than manually.
- A password manager with built-in TOTP support can generate these codes for you, which is convenient, though some people would rather keep 2FA on a separate device from their password manager for that extra bit of separation.
- Two-factor authentication protects sign-in, not the encryption on your mail itself. Aster’s zero-access architecture means your messages are encrypted with keys derived from your account, independent of any of this. Turning on 2FA is really about making sure it’s actually you at the door.
It takes about a minute to set up, and it meaningfully raises the bar for anyone trying to get into your account without your permission. If you haven’t turned it on yet, now’s a good time.

Founder and CEO of Aster Privacy.