Mail
Mail  Aster Bridge
  Tor access
 How to import your email into Aster
Switching email should not mean starting from an empty inbox. The mail you already have, the receipts, the threads, the things you meant to get back to, all of it should come with you. Aster gives you two ways to bring your old mail across, and this guide walks through both.
The first way is to connect your old account. You connect your Outlook account by signing in, or your Gmail account with an app password, and Aster pulls your mail over for you. The second way is a manual import, where you export a file from your old provider and upload it yourself. The manual path is fully zero-access: every message is encrypted on your own device before it ever reaches our servers.
Both live in the same place, so let us start there.
Where to find import
Open your Settings and choose the Import section. You will see a panel titled Import Emails with the line “Bring your emails from Gmail, Outlook, or other email services. Your emails are encrypted on your device before being stored.”
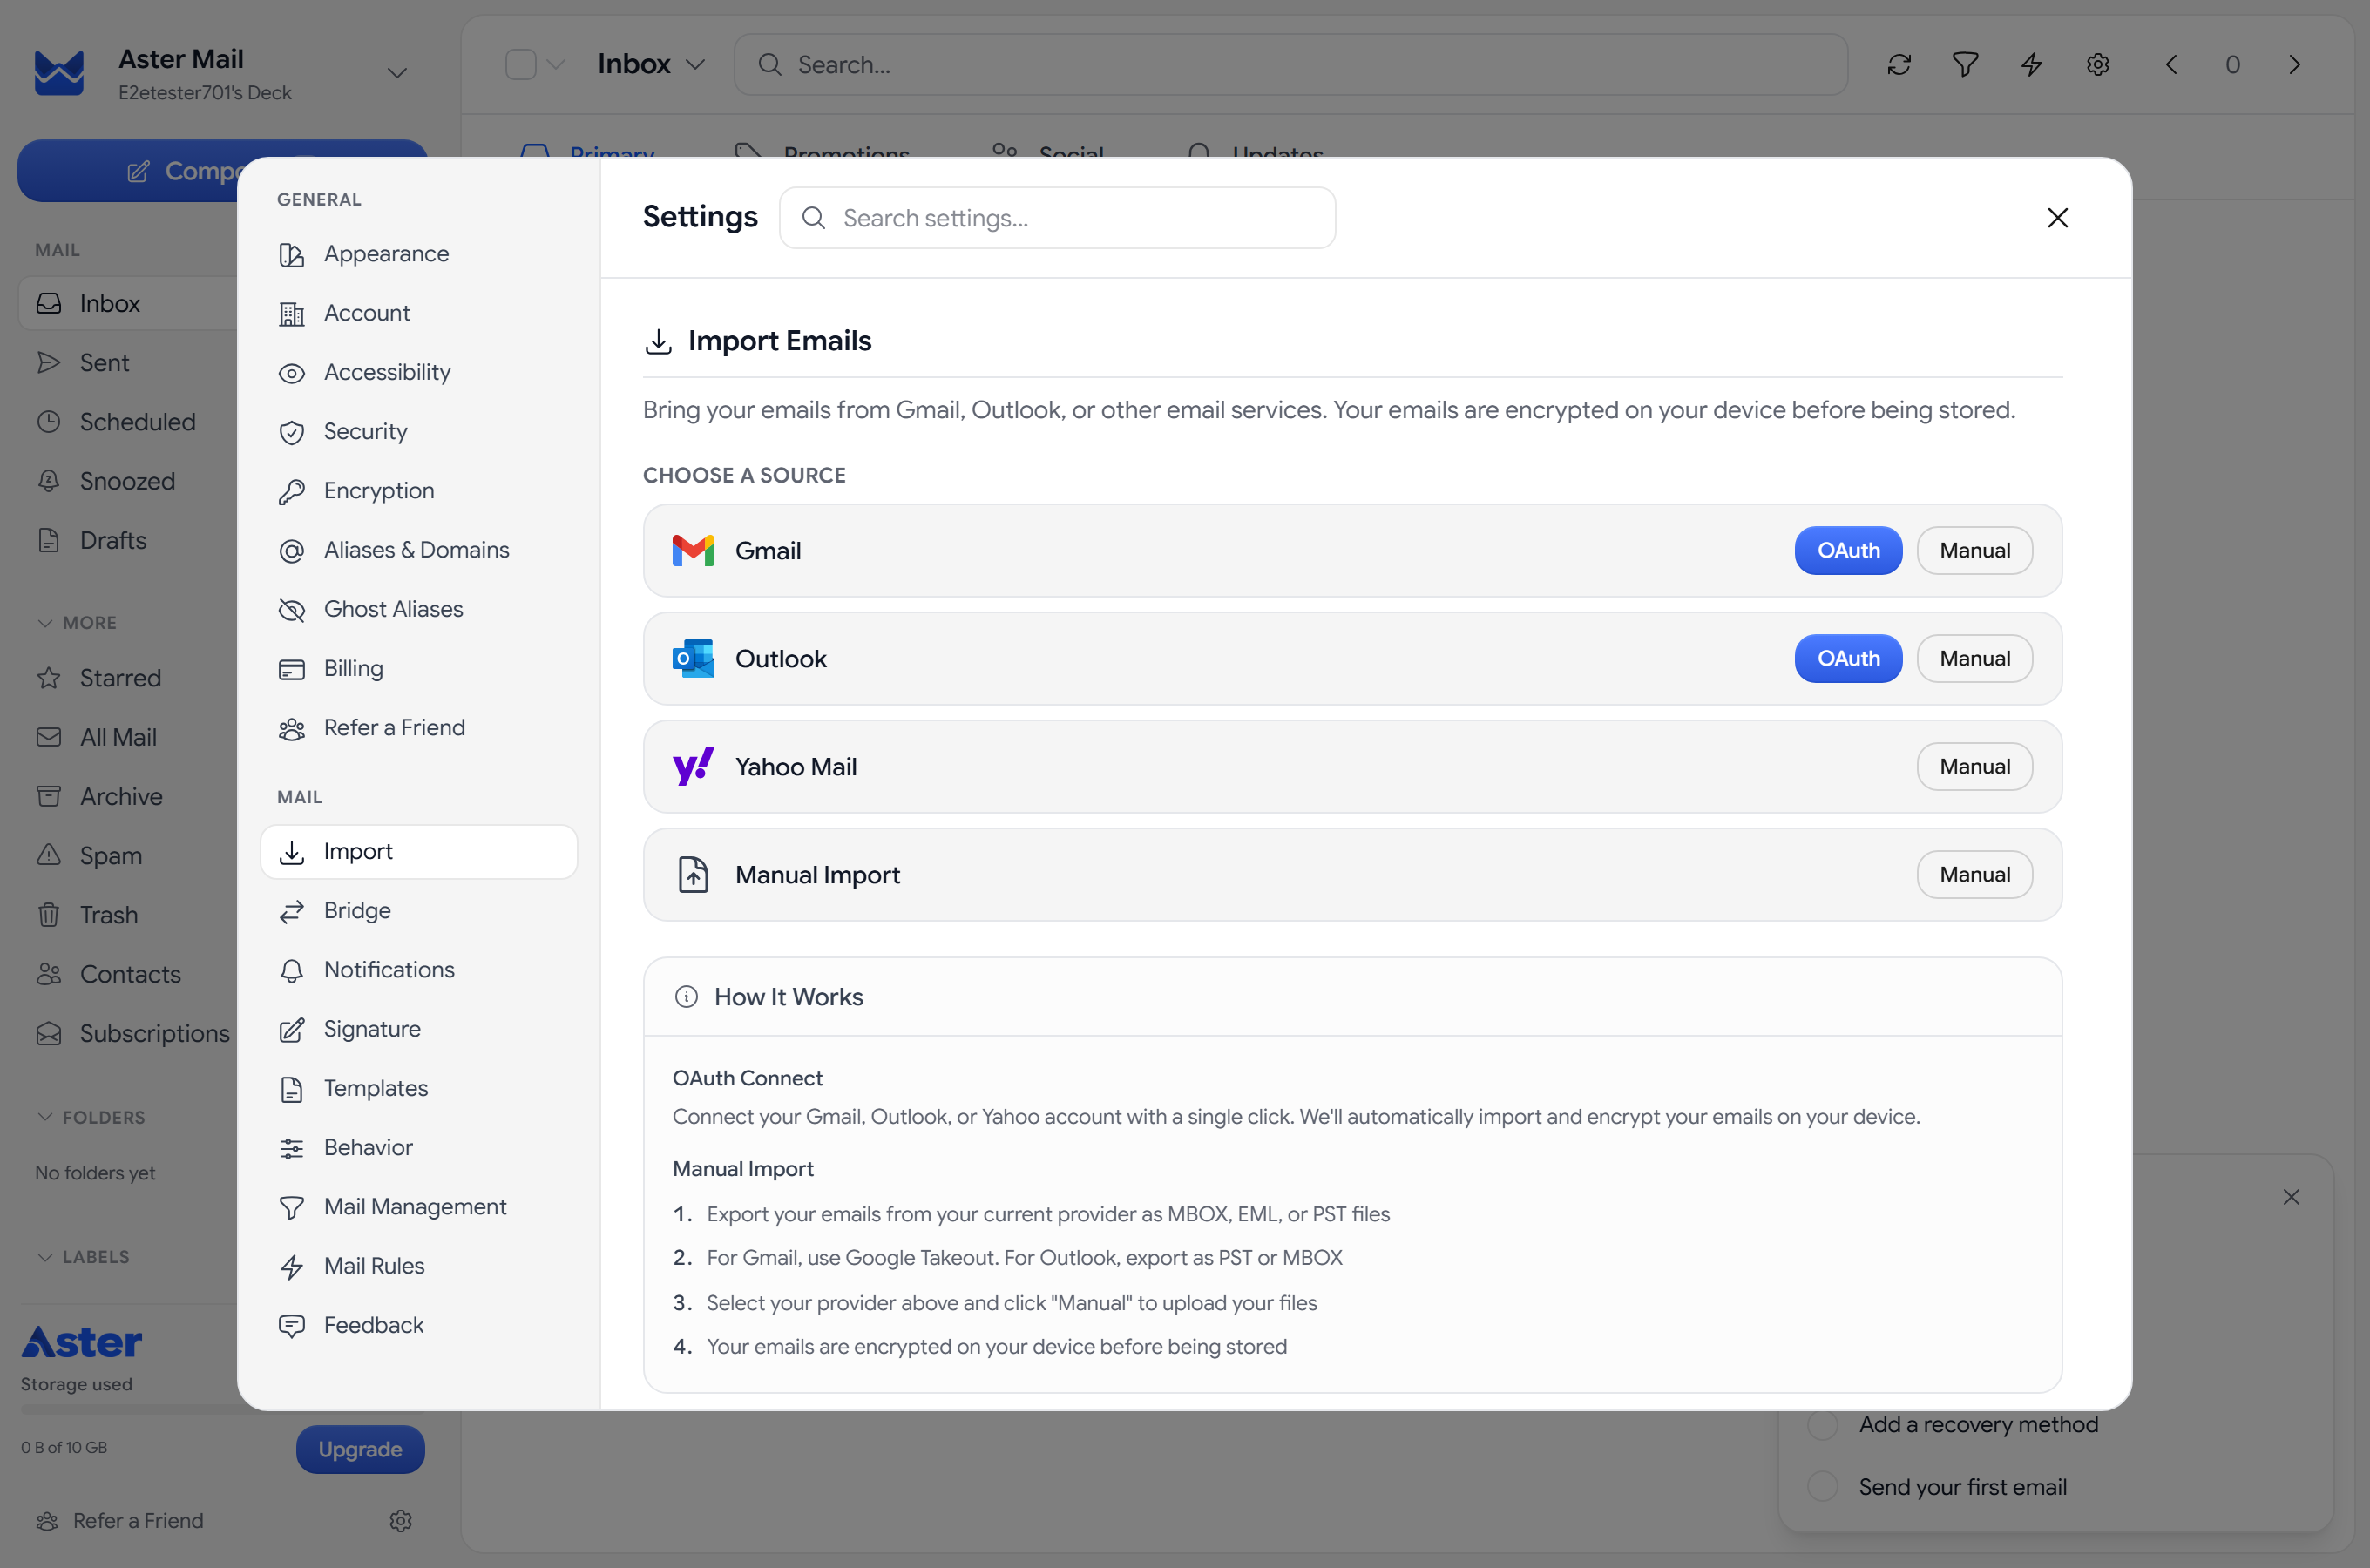
Each provider has its own row. Outlook shows OAuth to connect by signing in, Gmail shows Show me how to connect with an app password, and both also show Manual for a file upload. Yahoo Mail and the generic Manual Import row show a Manual button only. Pick the row that matches where your mail is coming from.
Part 1: Connect your Outlook or Gmail account
This is the fastest way to move.
Outlook
On the Outlook row, click OAuth. A window opens titled Connect Outlook to Aster with a single button, Sign in with Microsoft. Click it, and Aster sends you to Microsoft’s own sign-in and consent page.
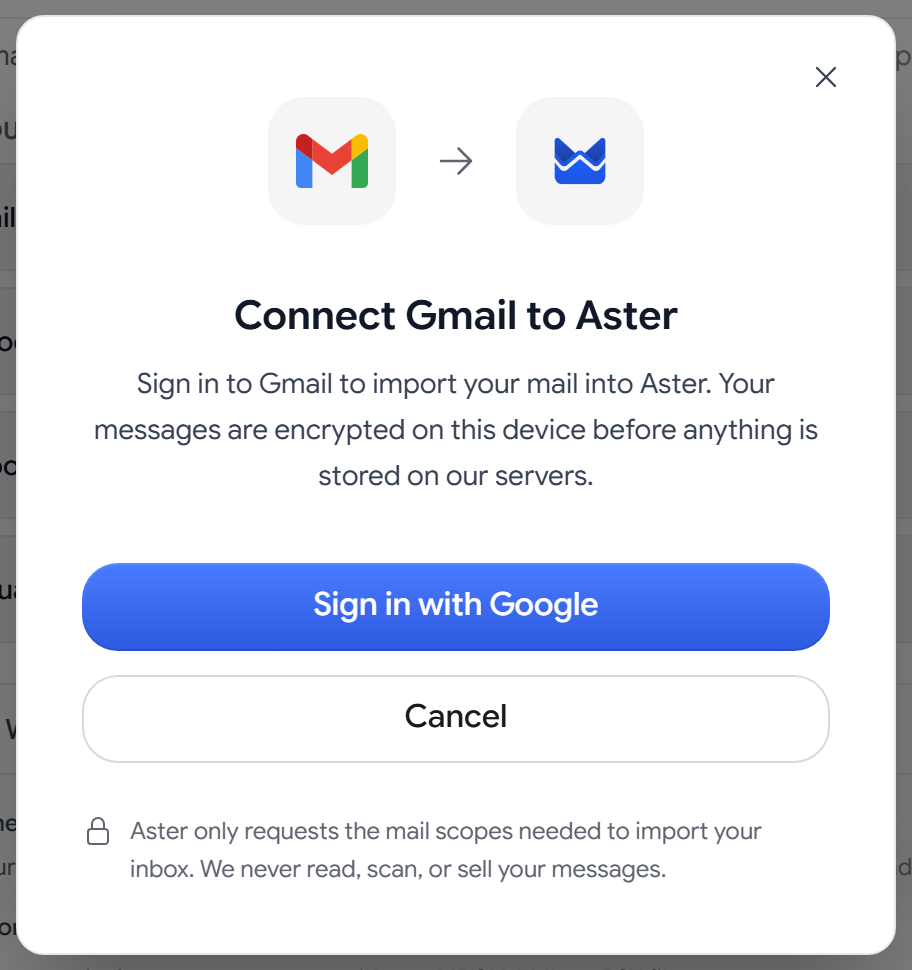
This is worth pausing on, because it is the part people ask about most. When you consent, Aster only asks for access to your mail and your email address. It does not ask for your contacts, your calendar, or your files. You are handing over exactly what is needed to copy your messages, and nothing else. You also never type your Outlook password into Aster. The sign-in happens on Microsoft’s own page, and Aster only ever receives a token, which we store encrypted.
Gmail
Gmail connects with an app password instead of a sign-in page. On the Gmail row, click Show me how. A window titled Create an app password walks you through the steps: turn on two-step verification for your Google account if it isn’t on already, create an app password and copy it, and make sure your mail, sent mail, and labels are visible to IMAP in your Gmail settings. Then click Continue, enter your Gmail address, and paste the app password into Aster. Your regular Gmail password doesn’t work here, and you never need to give it to Aster. Aster then imports all your mail, including archived mail, sent mail, and labels. Large mailboxes can take a few days to finish.
What happens after you connect Outlook
Once you approve the connection, the window closes and Aster gets to work. It first sets up folders to match your old account, so you will briefly see a “Setting up folders” note, and then it begins syncing. Your account now appears under Connected Accounts as a card that shows the email address, a live counter reading “{n} of {total} emails imported”, and a Sync Now button for later. When it finishes, you get a short summary of how many new messages came across.
What comes over is your mail and your folder structure. Your inbox stays your inbox, and nested folders are preserved. Contacts are a separate feature and are not part of this connection.
A note on privacy for connected accounts. You never type your Outlook password into Aster, and for Gmail you use an app password rather than your account password. For Outlook, Aster only ever receives a token, which we store encrypted. Aster asks only for the access it needs to reach your mail, and nothing beyond that, so your contacts, your calendar, and your files are never part of it. One thing to expect is that Microsoft’s consent screen may describe this access in broad terms, since reaching a mailbox this way counts as a single mail permission, but Aster uses it for one purpose only, which is bringing your messages across. If you would prefer that encryption happen entirely on your own device, so that your mail never passes through us in readable form at all, the manual file import below is the path for you.
If your mail is at Yahoo, you will notice there is no connect button on its row. For Yahoo, use the manual import described next.
Part 2: Manual import from a file
The manual path is the one to reach for when you want the strongest privacy guarantee, or when your provider is not Gmail or Outlook. Here, Aster reads and encrypts every message on your device before anything is uploaded. Our servers only ever receive encrypted messages and never see your mail in readable form.
Step 1: Export a file from your old provider
Before you import, you need a file of your old mail. Every major provider gives you one.
- Gmail: use Google Takeout and choose Mail. It gives you an MBOX file.
- Outlook: export your mail as a PST or MBOX file from the desktop app.
- Proton Mail: use Proton’s Export Tool to produce an EML or MBOX archive.
- Any other provider: almost every email app can export MBOX or EML, and both work here.
Step 2: Upload it to Aster
Back in Settings, Import, click Manual on the row that matches your provider, or on the Manual Import row for anything else. The Import Emails window opens with a drop area.
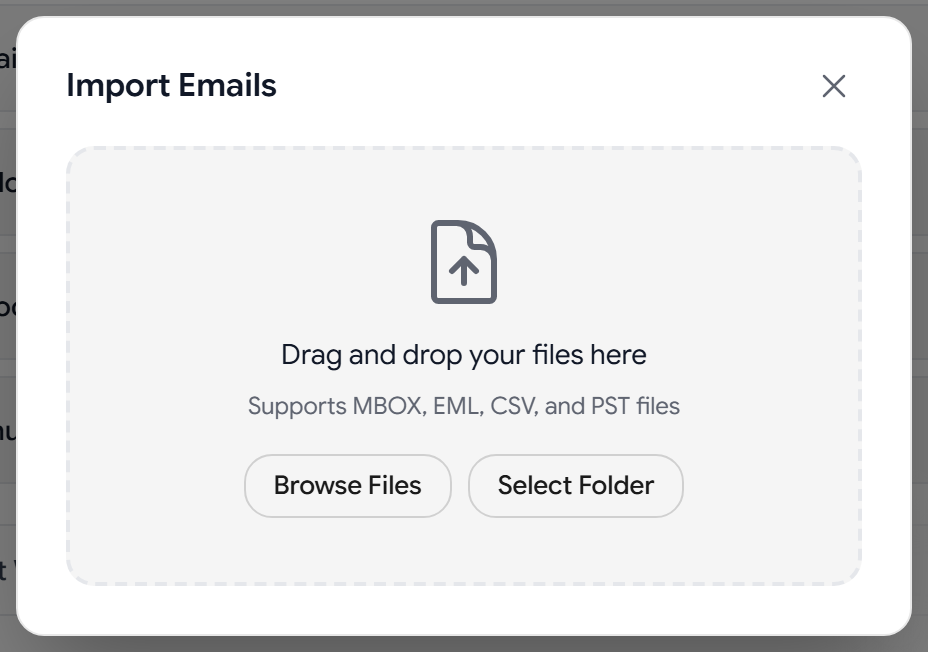
You can drag and drop your file onto the window, or use Browse Files to pick a single file, or Select Folder to point Aster at a folder full of individual EML messages. Supported formats are MBOX, EML, CSV, and PST.
Step 3: Let it run
As soon as you choose a file, Aster reads it locally, encrypts each message on your device, and uploads the encrypted results in small batches. You will see an “Importing emails” view with a live counter reading “{current} of {total} emails” and a Cancel Import button if you need to stop.
When it is done, you get an Import Complete screen with a count of how many messages were imported, along with how many duplicates were skipped and how many failed, if any.
Two things are worth knowing here. First, importing is safe to repeat. Aster recognizes messages you already have, so if you upload the same file twice, you will not end up with duplicates. Second, some messages may be sorted into Spam or Sent based on their content, so if a message seems missing after an import, those are the first folders to check.
Bringing over any other account, or keeping one in sync
The manual file import above makes a one-time copy of your mail. A connected account is different: it stays linked under Connected Accounts after that first import, so new mail arriving at your old address is carried over too, and you can use Sync Now whenever you like, right up until you disconnect it. If instead you want an account to keep actively syncing into Aster, receiving new mail and even sending from it, there is a separate feature for that. Go to Settings, select Import, open the External Accounts tab, and choose Add Account. There you can connect any IMAP or POP3 account by entering its server host, port, username, and password, test the connection, and pick which folders to sync. This is the right tool when your provider has no connect option and you are not ready to fully move yet.
A few things that help
- Storage. Imports count toward your plan’s storage, and Aster will let you know if an import would take you over your limit so nothing is lost silently.
- Large mailboxes. Very large exports import in batches, so give a big archive a little time and leave the window open until it reports it is complete.
- The consent window. When you connect Outlook, finish the sign-in reasonably promptly. The secure link Aster creates for the connection expires after about ten minutes, and you can start again if it does.
- Reconnecting. If a connected account ever needs you to sign in again, its card turns amber with a Reconnect button. One click puts it right.
- Removing an account. Disconnecting a connected account is a single click, and Aster asks whether you would also like to delete the messages it imported, so the choice is always yours.
Your mail belongs to you, and moving it should be straightforward and private. Whether you connect an account or bring a file across yourself, the goal is the same: everything you already have, waiting for you in Aster, encrypted and under your control.

Founder and CEO of Aster Privacy.