Mail
Mail How to use a domain you already own for email

Most domains sit there doing very little. Someone buys one for a website, or for a project that never quite happened, and the email side of it stays switched off for years afterward. That’s the half worth using, though, because the address is the part you’d end up touching every day, and an address at your own name isn’t tied to whoever happens to be hosting your mail this year.
Connecting a domain you already own comes down to pasting a few records into your DNS settings, and Aster checks them as you go. This guide walks through all six of them in the order the setup wizard asks for them, and explains what each one is for as it comes up, because knowing that makes the failures much less mysterious. If you don’t own a domain yet, the guide to buying one inside Aster is the one you want, since Aster writes the DNS records for you on that path.
What you need before you start
You’ll need the domain and the sign-in for wherever its DNS lives, which is usually the registrar you bought it from, though it might be somewhere else if you moved your nameservers at some point. You’ll also need a plan that includes custom domains, and the Domains tab shows your count against your limit in the top right corner if you want to check first.
There’s one decision worth making before you touch anything. If mail already arrives at this domain somewhere else, changing the MX record sends everything to Aster from that point on, and whatever’s already sitting in the old mailbox stays behind. You can bring it over afterward with the import tool.
Where to find it
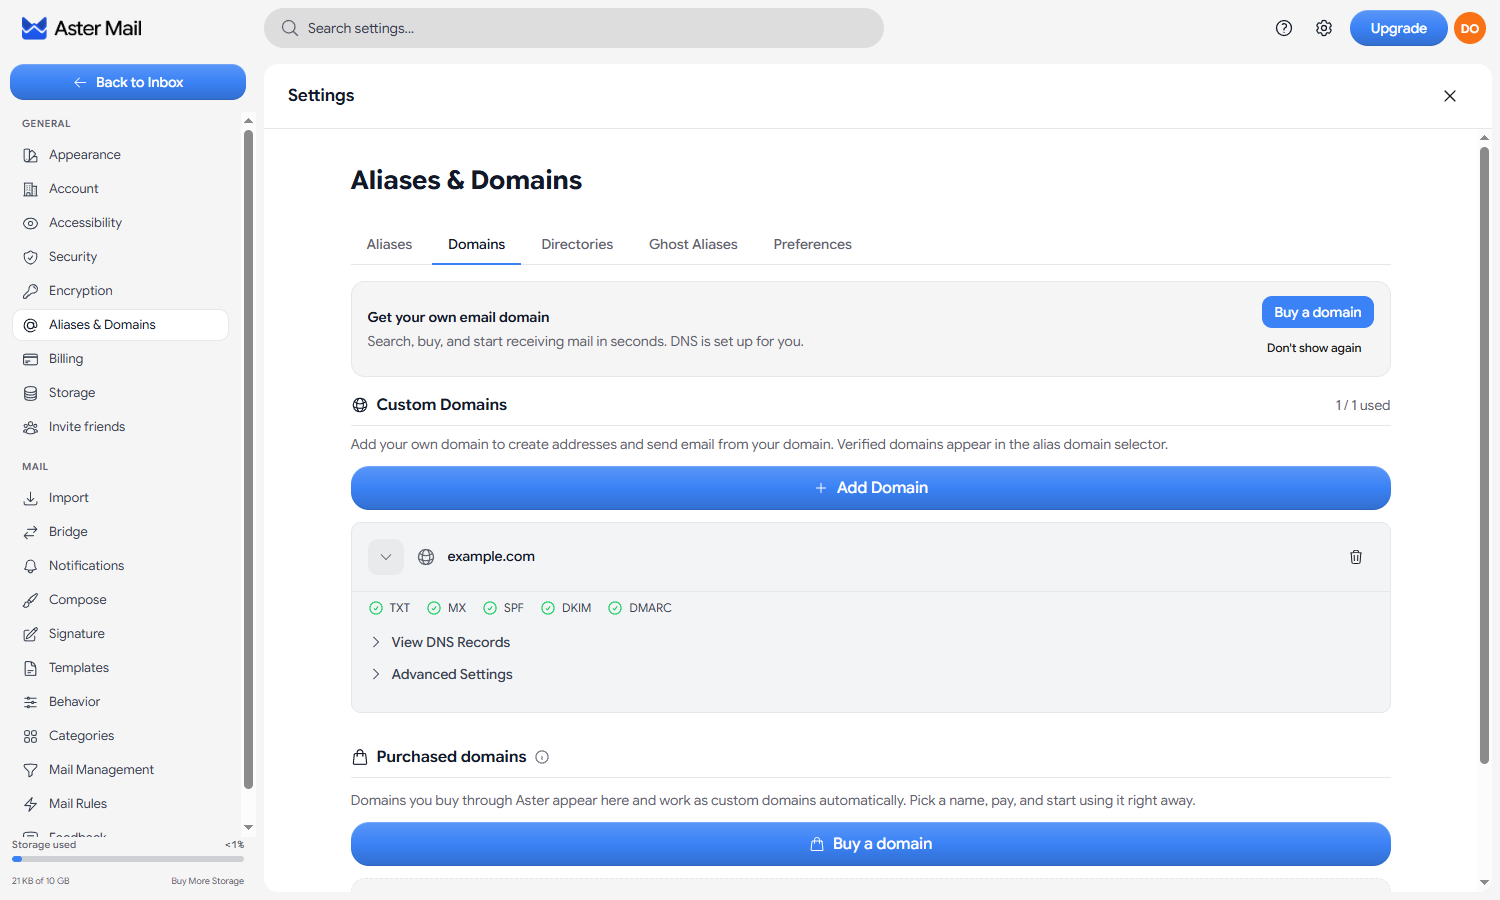
Open Settings, then Aliases & Domains, and switch to the Domains tab. Under Custom Domains, click Add Domain.
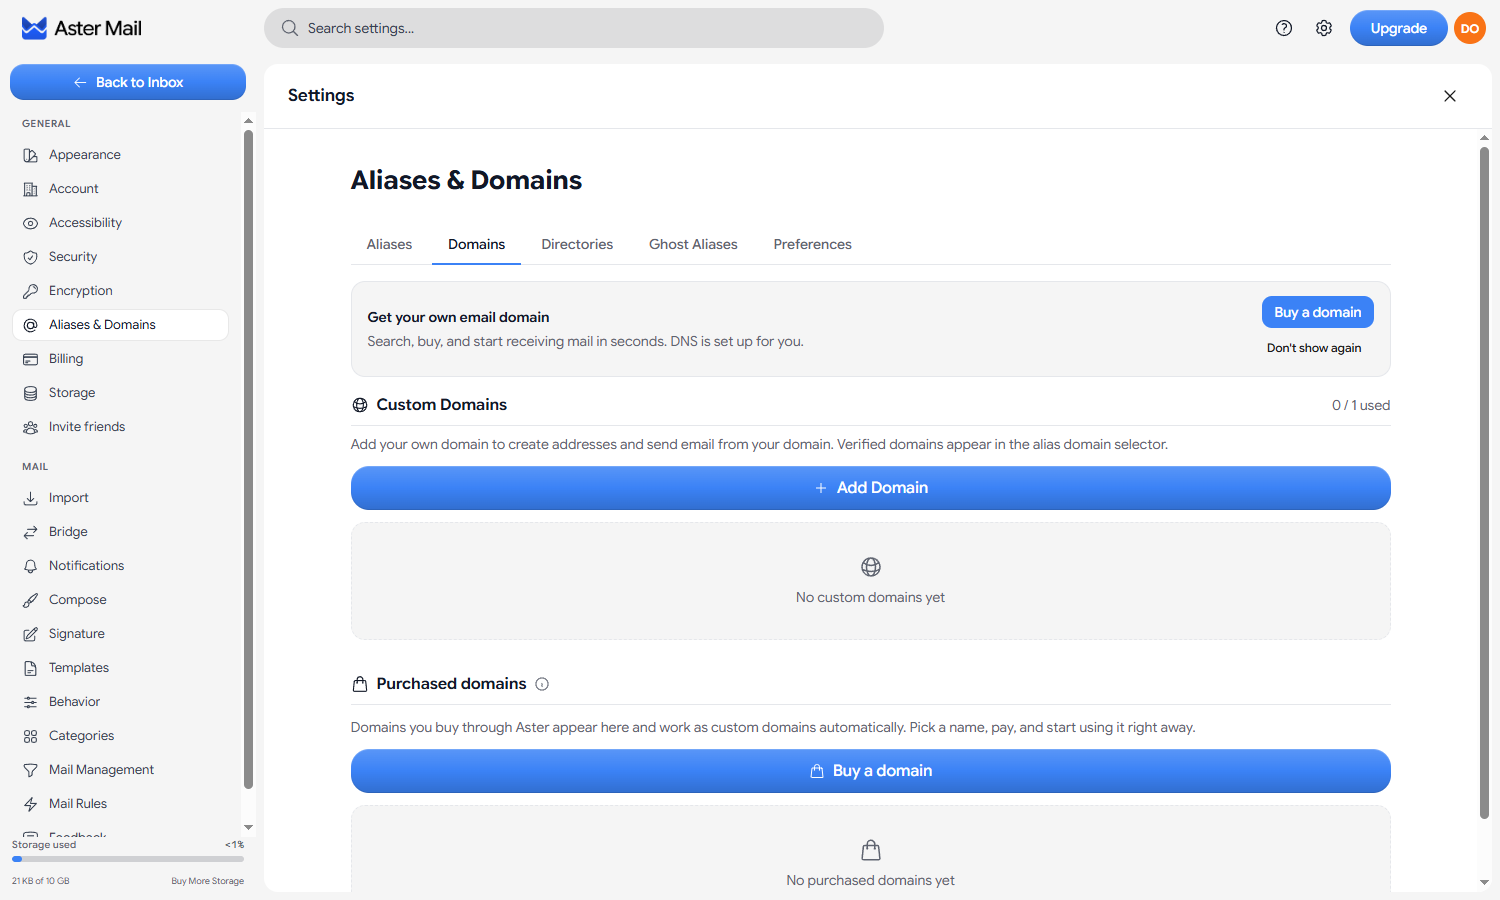
Step 1: Add your domain
Type the domain on its own, with no www and no https://, then click Continue. Aster takes it, generates a set of records that belong to your domain and nobody else’s, and opens the setup wizard.
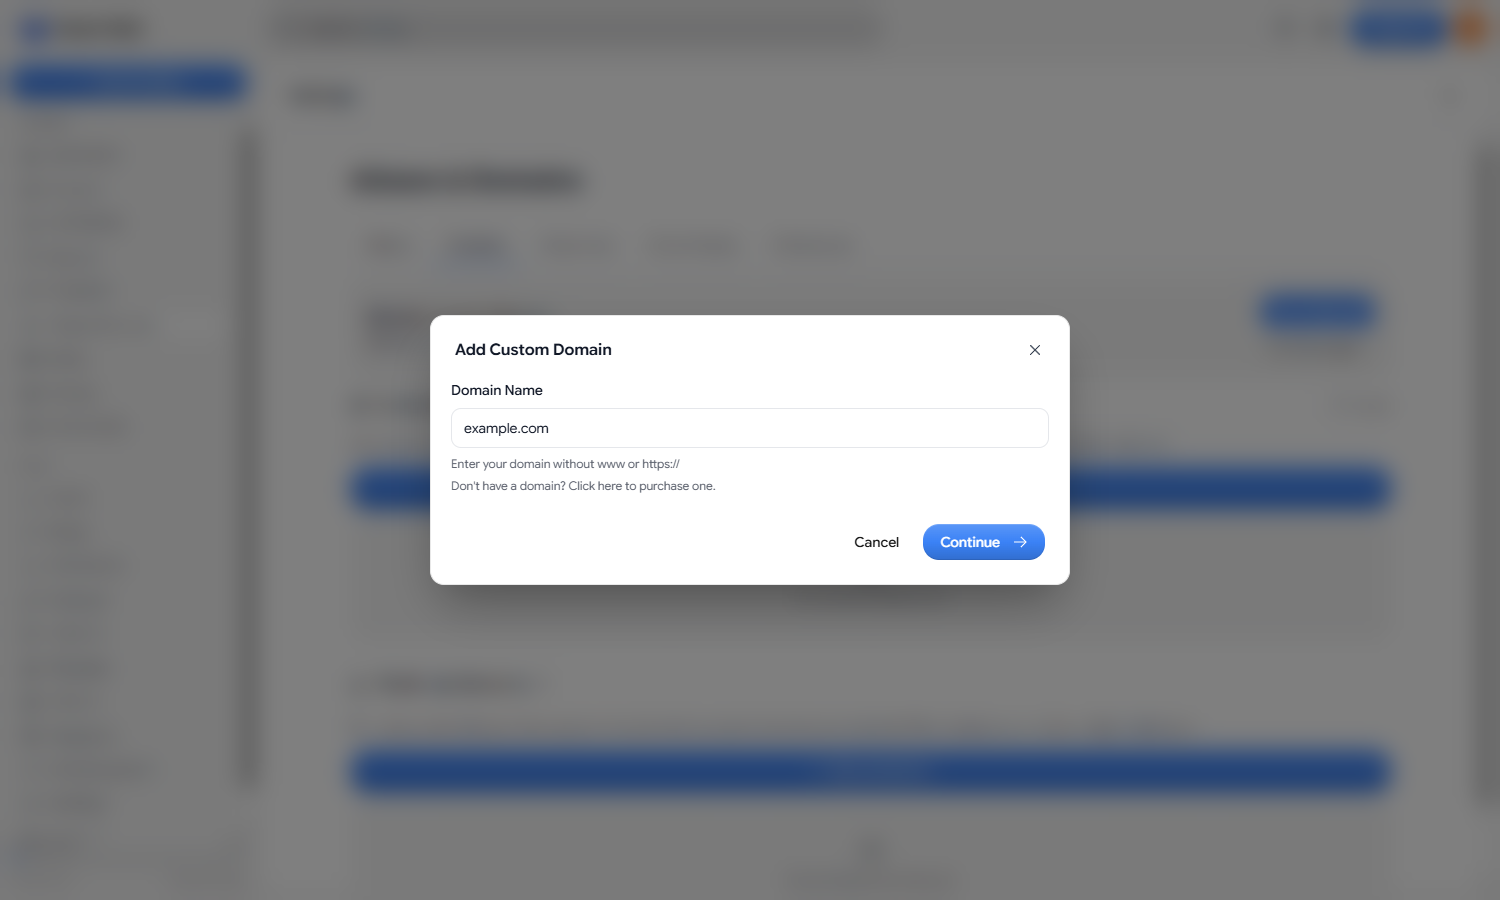
While that happens, Aster also looks up your nameservers to figure out who runs your DNS. When it recognizes the provider, the instructions at the top of every step get rewritten for that particular dashboard, which spares you some hunting through menus. The screenshots below show one provider’s wording, and yours will name whichever one you happen to use.
Step 2: Prove the domain is yours
First up is a TXT record proving you control the domain. It’s what stops anyone from pointing a domain they don’t own at their own Aster account, and until it’s in place none of the other records get looked at.
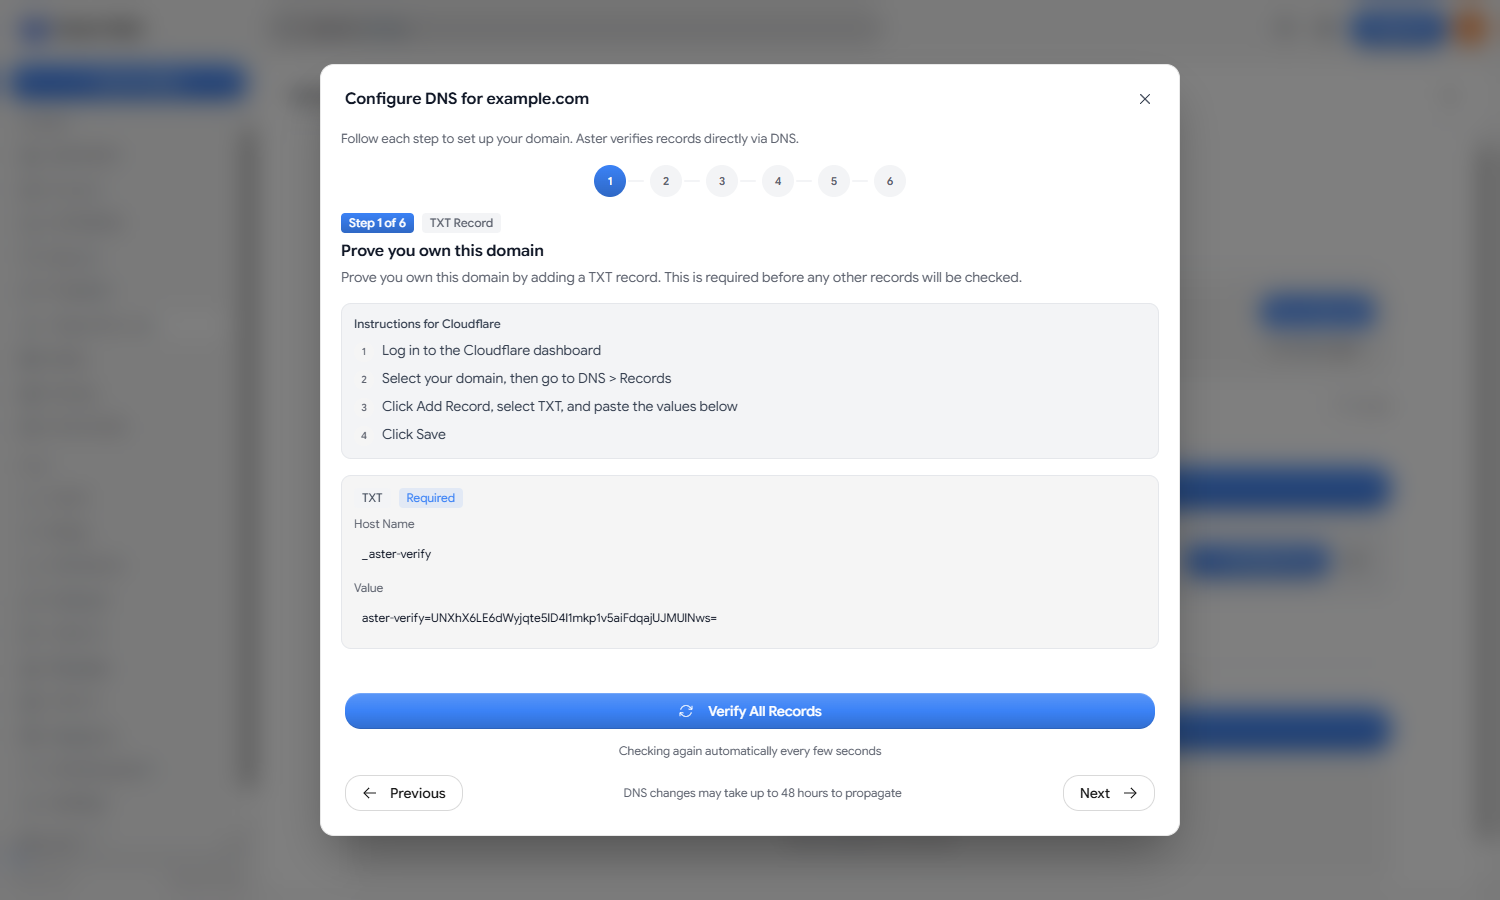
Add a TXT record with the host _aster-verify, and copy the value across exactly as Aster shows it. It starts with aster-verify= and is generated for your domain, so the one in the screenshot won’t do you any good. Enter the host as _aster-verify by itself rather than _aster-verify.yourdomain.com, because nearly every provider tacks the domain on for you and you’d otherwise end up with it in there twice.
Step 3: Point incoming mail at Aster
The MX record is what tells every other mail server on the internet where your mail should be delivered.
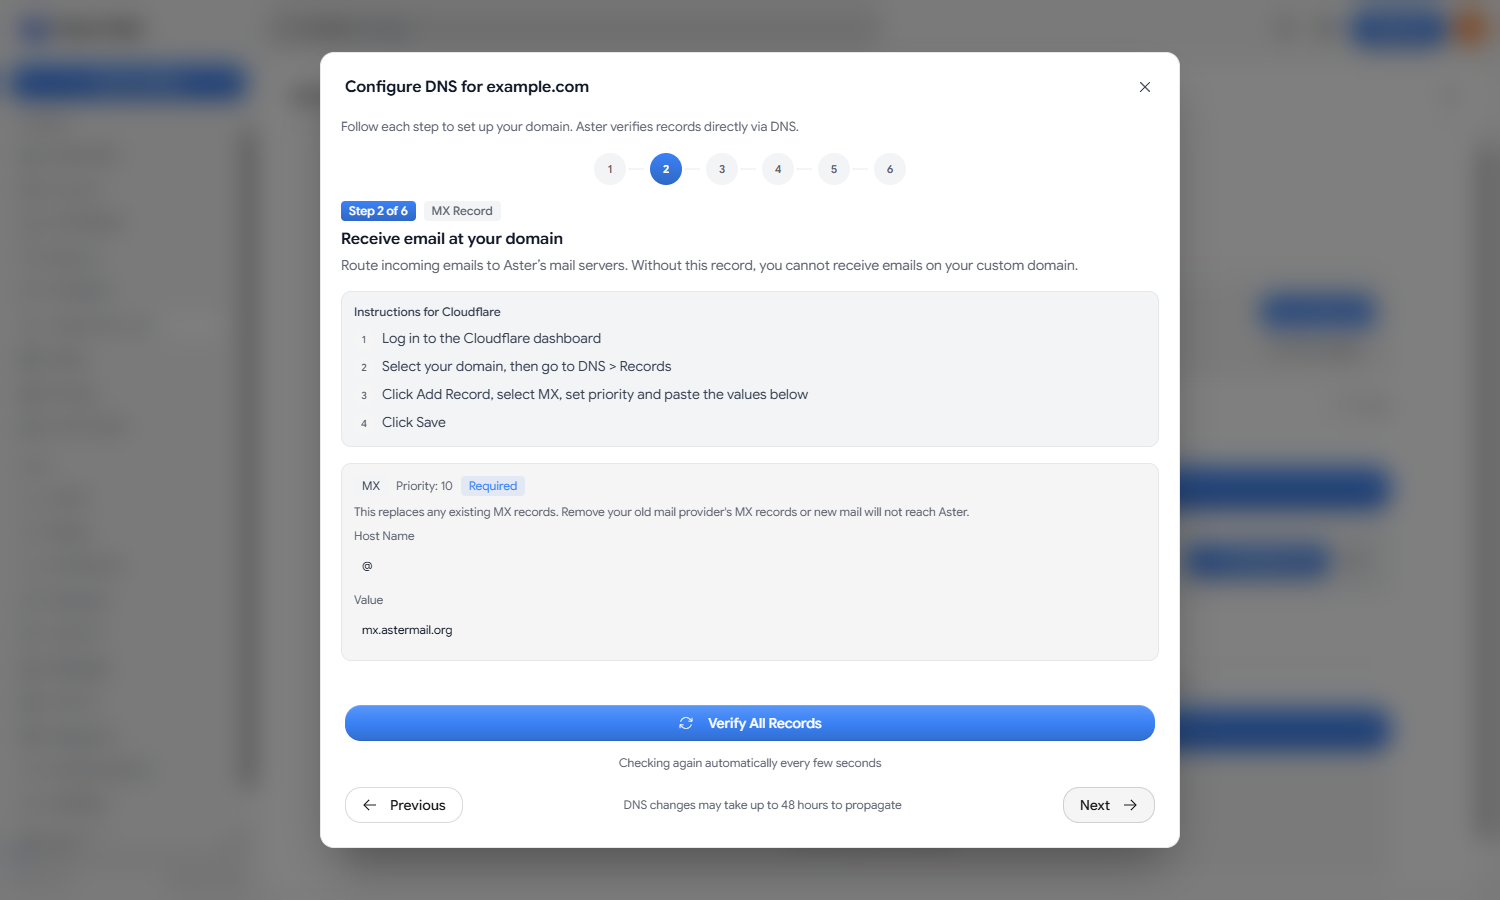
Add an MX record with the host @, which is how DNS spells “the domain itself”, a priority of 10, and mx.astermail.org as the value. If there are MX records left over from a previous mail provider, delete them while you’re in there. Leaving them behind means some servers carry on delivering to the old place, and your mail ends up split across two mailboxes with nothing obvious to explain which message went where.
Step 4: Let Aster send on your behalf
SPF is a public list of the servers allowed to send mail as your domain. Other servers check it when your mail arrives, and anything sent from a server that isn’t on the list gets treated as suspect.
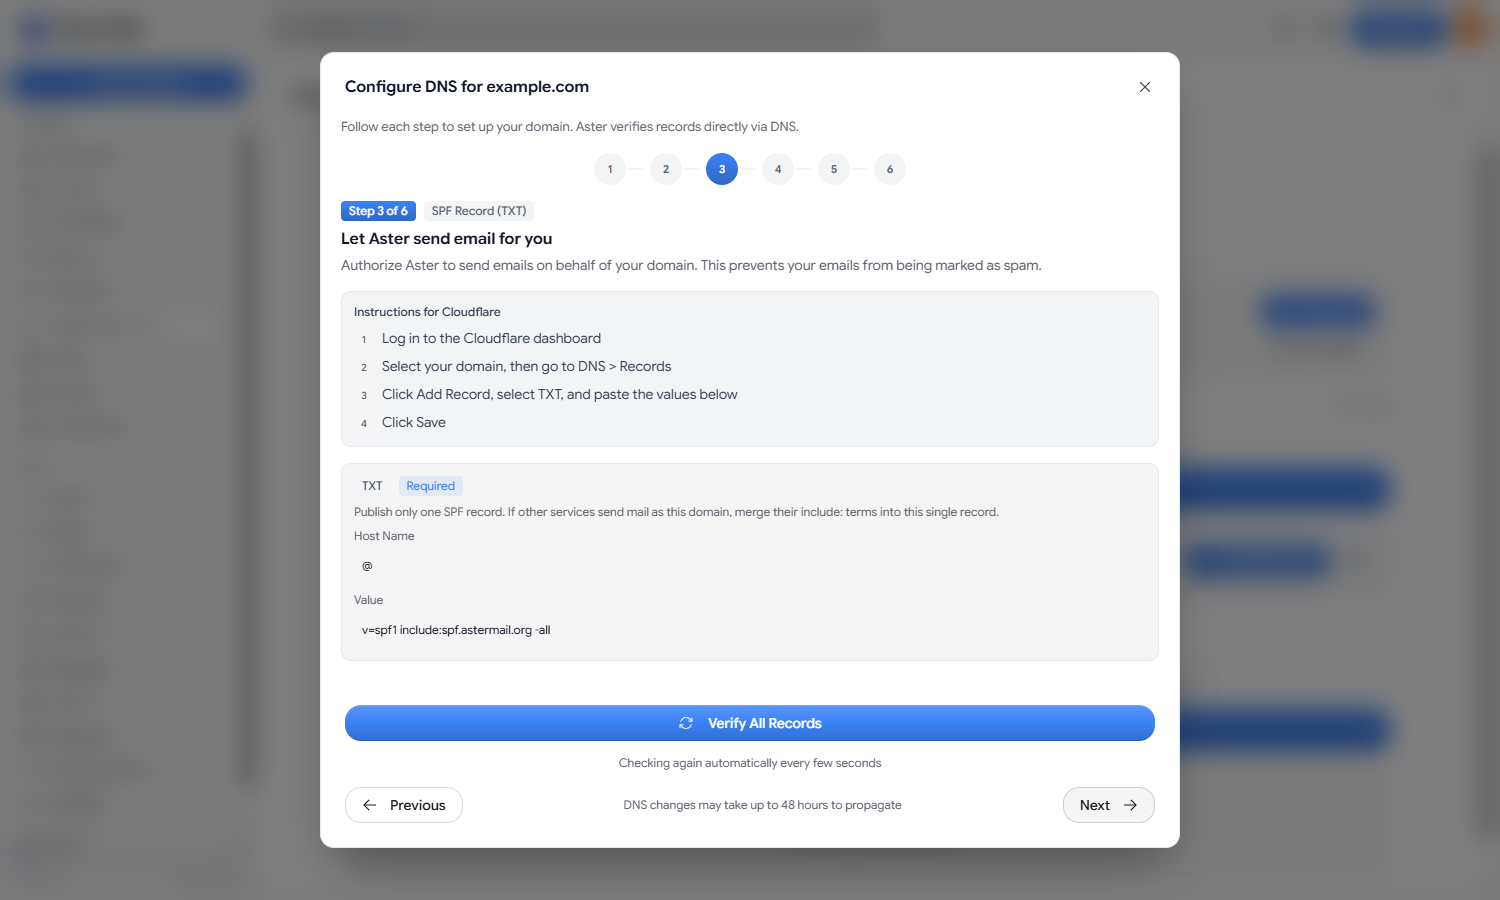
Add a TXT record with the host @ and the value v=spf1 include:spf.astermail.org -all. A domain is only supposed to have one SPF record, so if there’s already one there for a newsletter tool or a shop platform, don’t add a second. Drop include:spf.astermail.org into the record you’ve already got and leave the rest of it alone.
Step 5: Sign your outgoing mail
DKIM puts a cryptographic signature on everything you send, which lets the server on the other end confirm the message really came from your domain and reached them unaltered. Aster generates a key pair when you add the domain and holds on to the private half, and the record you’re publishing here is the public half.
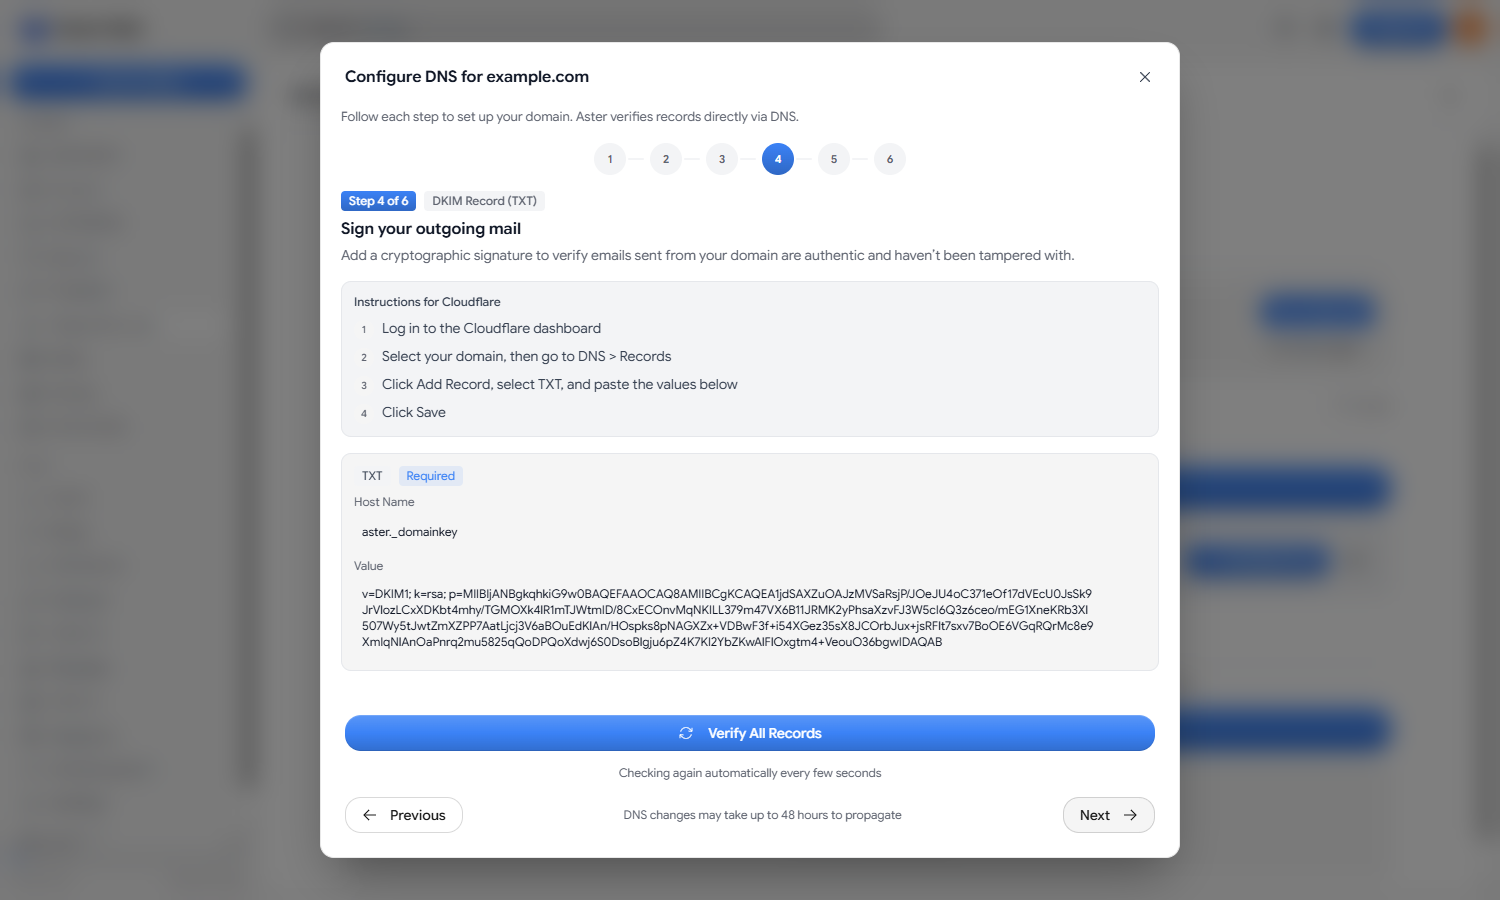
Add a TXT record with the host aster._domainkey and paste in the long value beginning with v=DKIM1. This is the one that goes wrong most often, because quite a few DNS dashboards cut long values short without saying anything about it. Save the record, open it again, and check the last handful of characters against what Aster is showing you. If they don’t line up, it got truncated, and no amount of waiting will turn that check green.
Step 6: Say what should happen to forgeries
DMARC pulls the previous two records together. It tells receiving servers how to treat a message that claims to be from your domain but fails both SPF and DKIM, and it asks them to report back on what they’re seeing.
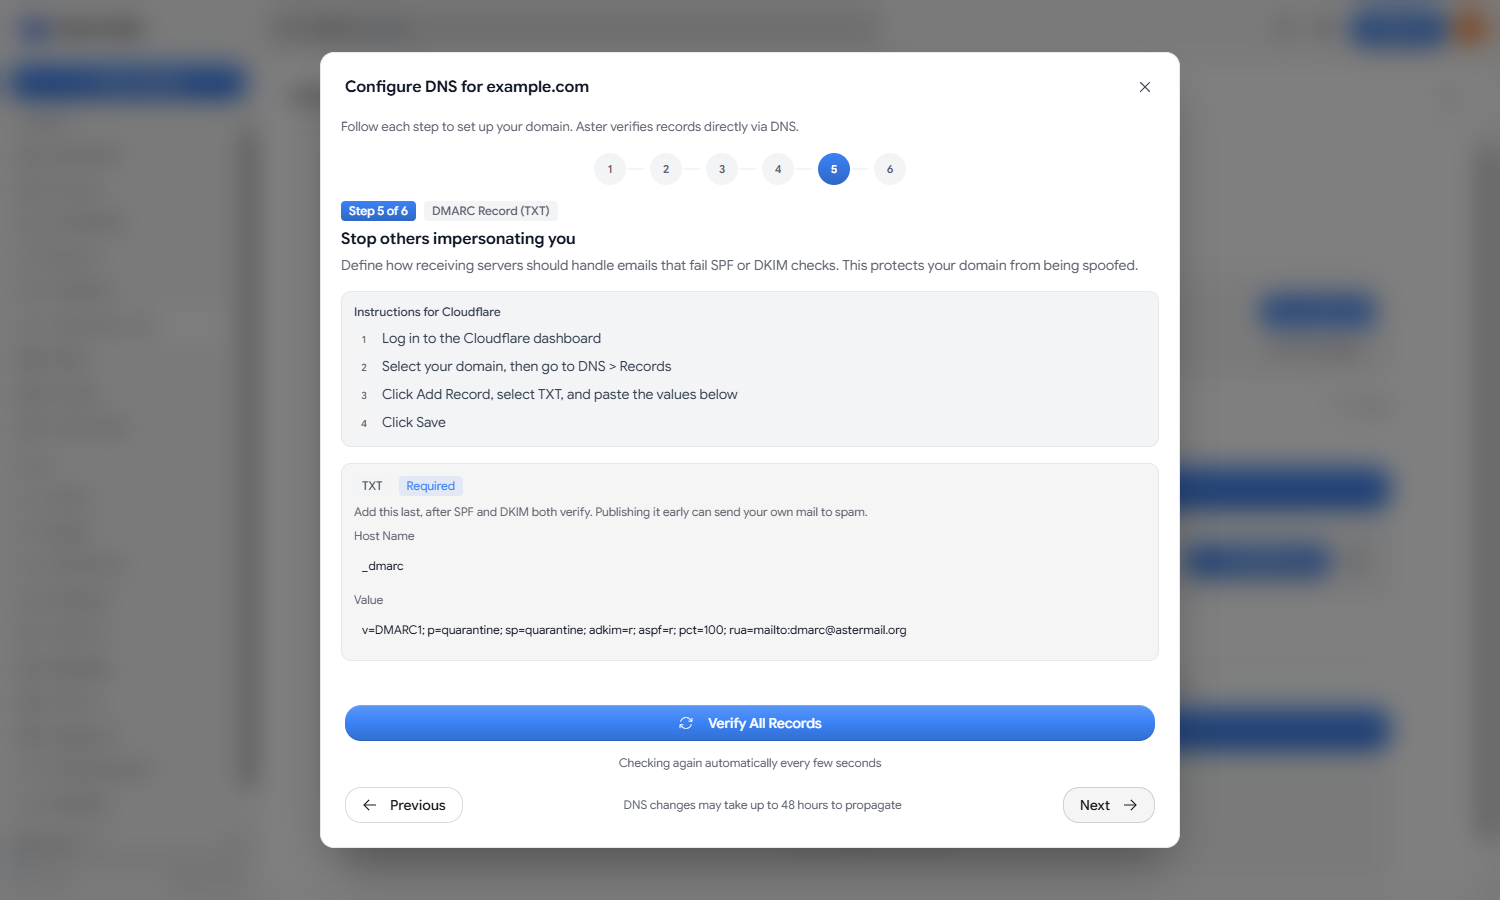
Add a TXT record with the host _dmarc and the value Aster gives you. It sets a policy of quarantine, which sends anything that fails to spam instead of the inbox. Save this one last, once SPF and DKIM have both gone green. Publishing a policy while your own sending records are still half finished is a well-worn way to spend a day wondering why your mail keeps landing in spam.
The optional seventh record
The wizard has one more step, and you can skip it. TLS-RPT asks receiving servers to send you a daily summary whenever encrypted delivery to your domain fails, which gives you a quiet heads-up that something is wrong with the connection rather than with the mail going over it.
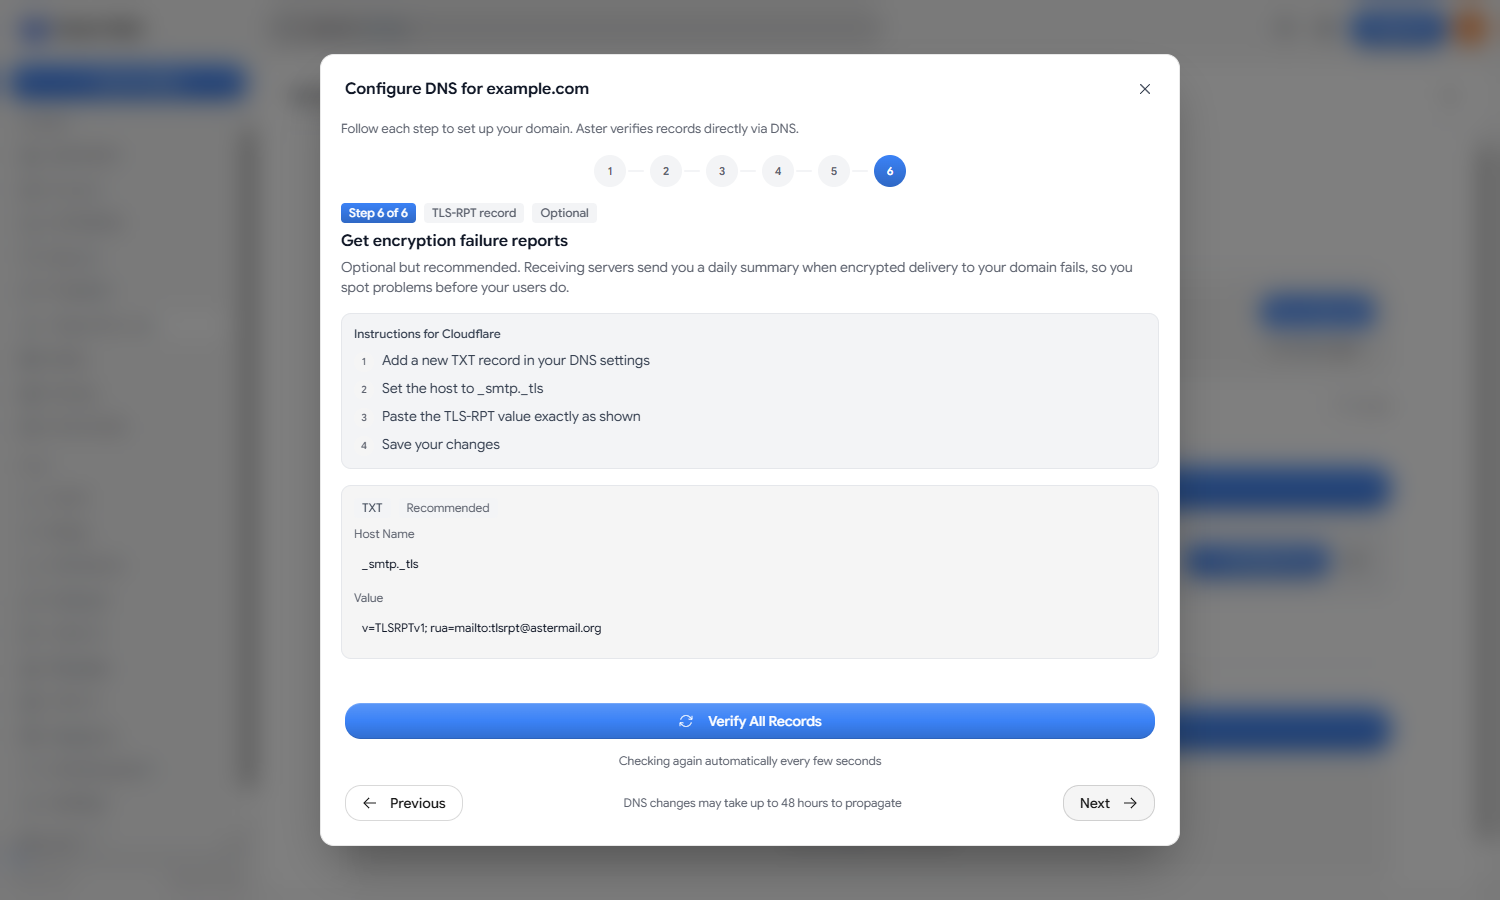
Add a TXT record with the host _smtp._tls and the value shown, or leave it for another day. Your domain works either way.
Wait for the records to appear
DNS never updates everywhere at once, because the answers get cached along the way and every cache expires on its own schedule. Most providers have new records out within a few minutes, and the far end of the range is about 48 hours. Aster keeps rechecking every few seconds while the wizard is open, and Verify All Records forces a check straight away if you’d rather not wait for the next one.
Records turn green one at a time as they’re found. Anything still red is almost always one of the same few things, so check whether a stray space came along with the pasted value, whether the host went in as the full domain name when the provider only wanted the prefix, and whether enough time has passed. Once the five required records check out, the domain goes active.
Start using your addresses
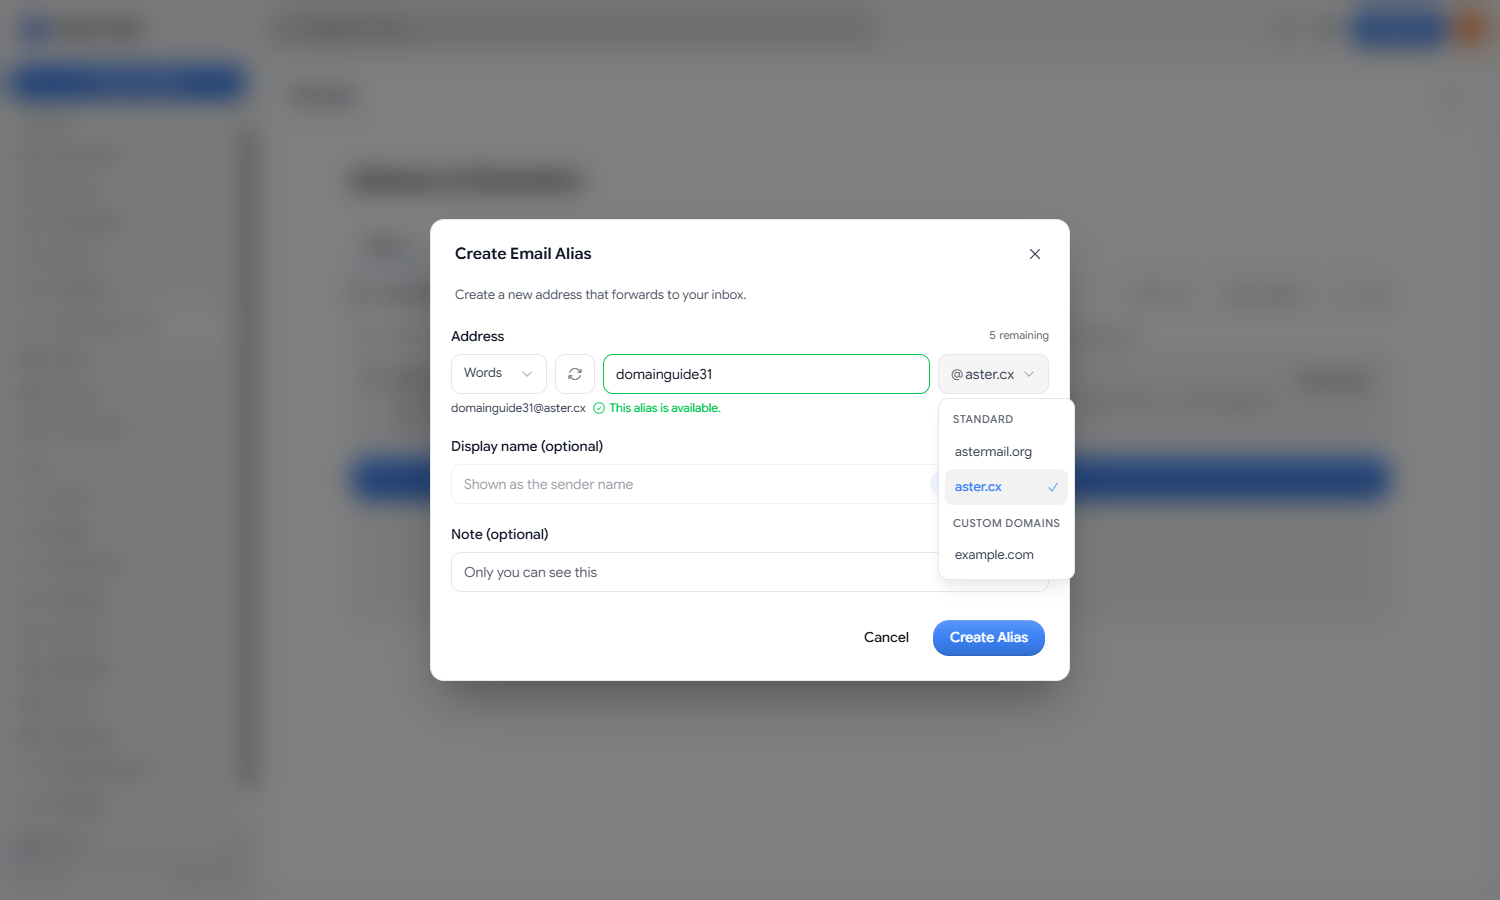
An active domain turns up everywhere you’d pick an address. Create an alias from the Aliases tab and you’ll find your domain under Custom Domains in the selector, so getting to hello@yourdomain.com takes about five seconds. Addresses made this way behave like every other address on your account, and anything you send from one goes out signed with your domain’s DKIM key.
Expanding the domain in the Domains tab gets you two other things. View DNS Records is where the values live if you ever need them again, and Advanced Settings holds Catch-all. Turn catch-all on and mail sent to any address at your domain reaches you, including addresses you never got around to creating, which is handy for handing out a different address to every service you sign up for. The trade-off is that spam aimed at random names on your domain arrives right along with it.
A few things that help
- Watch the renewal date at your registrar. Aster keeps checking your records for as long as the domain is yours, so a domain that quietly expires stops receiving mail no matter how well it was set up.
- Put the records wherever your DNS is actually hosted, which isn’t always the company that sold you the domain. If your nameservers point at a hosting service or a CDN, that’s where these belong.
- Leave the TTL on whatever your provider suggests. A low one shortens the wait while you’re still setting up, and once everything is verified it stops mattering.
- If the domain is carrying real mail today, work through the records in the order the wizard lists them and let each one verify before moving on. Verification, MX, SPF, and DKIM are all safe to put in early, and DMARC is the only one worth holding back.
- A domain that has never sent mail before takes a few weeks to build up any reputation with the big providers. Normal back and forth does that quietly on its own, and a few hundred messages on the first day does the opposite.
There’s more to read here than there is to do. Six values go into your DNS dashboard, they take a few minutes to spread, and the domain you’ve been paying for since 2019 finally starts carrying your mail.

Founder and CEO of Aster Privacy.